I am on an ongoing quest on replaying the Battle for Heraclea looking for good fast play ancients rules that play under an hour on a 2'x2' table. For the seventh game I will be using Crusader Historical Miniature Rules by Marks Sims of Crusader Miniatures. Available in PDF from Crusader Miniatures. There are also two army lists for Macedonian and Punic Wars, and Armies and Enemies of Imperial Rome. There is an active online forum. Reviews can be found at Small Battles, War and Peace Games and a short one in this TMP thread. I should fess up now and say I do not think these rules will work on a 2'x2' table, but I have been wanting to try these rules out for years. To relieve you from skipping to the end of this post - they are NOT suitable for 2'x2' play, but they ARE fun.
This report is a bit light on pictures as the game went faster than I thought it would. It is also very detailed, although I tend not to mention the the pips on the dice rolled, I do mention die roll modifiers a fair bit. My aim is provide a lot of detail on the rule mechanisms to assist someone deciding to play with the rules or not. And it will help me remember the rules if I ever get around to doing a comparison of the rules I used to replay Heraclea. Lastly, there is a complete game example in the rulebook itself, that actually has more detail than this post - it documents each die roll pip as well.
Troops
Crusader works on units which are made up of a number of stands. Stands are removed as losses. Minimum size of units is 4 stands. Playing with WRG standard 40mm wide bases gives me two choices: use the rules as per normal, or say one base = one unit and track stand losses. The latter would work ok as combat is between units, not stands. But if I did the one base = one unit, the game will last longer as I will have a lot more units on the table. So I will crowd the table out a bit and make units multiple stands, as per the rules.
Troop Definitions
Romans
Leves: 1 unit of 4 stands. Trained, CS: Poor, BS: Av, WND:2, ATT:1, TL:6, M:6, ARM: Light, Hand Weapons, Javelins, Skirmishers.
Hastati: 1 units of 4 stands. Trained, CS:Av, WND:3, ATT:2, TL:7, M:4, ARM: Light, Hand Weapons, Thrown Melee Weapons, Drilled.
Principes: 1 units of 4 stands. Regular, CS:Av, WND:3, ATT:2, TL:7, M:4, ARM: Light, Hand Weapons, Thrown Melee Weapons, Drilled.
Principes: 1 units of 4 stands. Regular, CS:Av, WND:3, ATT:2, TL:7, M:4, ARM: Light, Hand Weapons, Thrown Melee Weapons, Drilled.
Triarii: 1 unit of4 stands. Seasoned, CS:Av, WND:3, ATT:2, TL:8, M:4, ARM: Med, Hand Weapons, Long Spears, Drilled, Steadfast.
Light Infantry: 1 unit of 4 stands. Levy, CS:Av, WND:3, ATT:2, TL:6, M:4, ARM: Light, Hand Weapons, Thrown Melee Weapons.
Heavy Cavalry: 1 unit of 6 stands. Trained, CS:Poor, WND:3, ATT:2, TL:6, M:8, ARM: Light, Hand Weapons, Mounted.
Heavy Cavalry: 1 unit of 6 stands. Trained, CS:Poor, WND:3, ATT:2, TL:6, M:8, ARM: Light, Hand Weapons, Mounted.
Light Cavalry: 1 unit of 4 stands. Trained, CS:Poor, BS: Av, WND:2, ATT:1, TL:5, M:8, ARM: Light, Hand Weapons, Mounted, Skirmishers, Javelins.
Commander is +1
Breakpoint is 6
Commander is +1
Breakpoint is 6
Epirot
Hypaspist: 1 unit of 6 Stands (but became 4 - see below). Seasoned, CS:Good, WND:3, ATT:2, TL:8, M:4, ARM: Med, Pike, Phalanx, Hand Weapons.
Pikemen and Hoplites: 1 unit of 9 stands (but became 6 - see below). Regular, CS:Av, WND:3, ATT:2, TL:6, MV:4, ARM: Med, Pike, Phalanx, Hand Weapons.
Light Infantry: 1 unit of 4 stands. Levy, CS:Av, WND:3, ATT:2, TL:6, M:4, ARM: Light, Hand Weapons, Thrown Melee Weapons
Skirmisher and Slingers: 1 unit of 4 stands. Levy, CS: Poor, BS:Poor, WND:2, ATT:1,TL:4, MV:6,ARM:Light, Hand Weapons, Skirmishers, Sling
Agema: 1 unit of 4 stands. Seasoned, CS:Good, WND:3, ATT:2, TL:7, M:8, ARM: Med, Hand Weapons, Mounted, Thrown Melee Weapons.
Light Cavalry: 1 unit of 4 stands. Trained, CS:Poor, BS: Av, WND:2, ATT:1, TL:5, M:8, ARM: Light, Hand Weapons, Mounted, Skirmishers, Javelins
Elephant: 1 Elephant stand. Regular. CS: Good, WND:5, ATT:3, TL:6, M:6, ARM: Light, Elephant, towerCommander is +2
Breakpoint is 5
Note: During play I reduced the Hypaspists to 4 stands and the Pikemen/Hoplites to 6 stands as I had misread the rules and made the unit larger than necessary.
Deployment
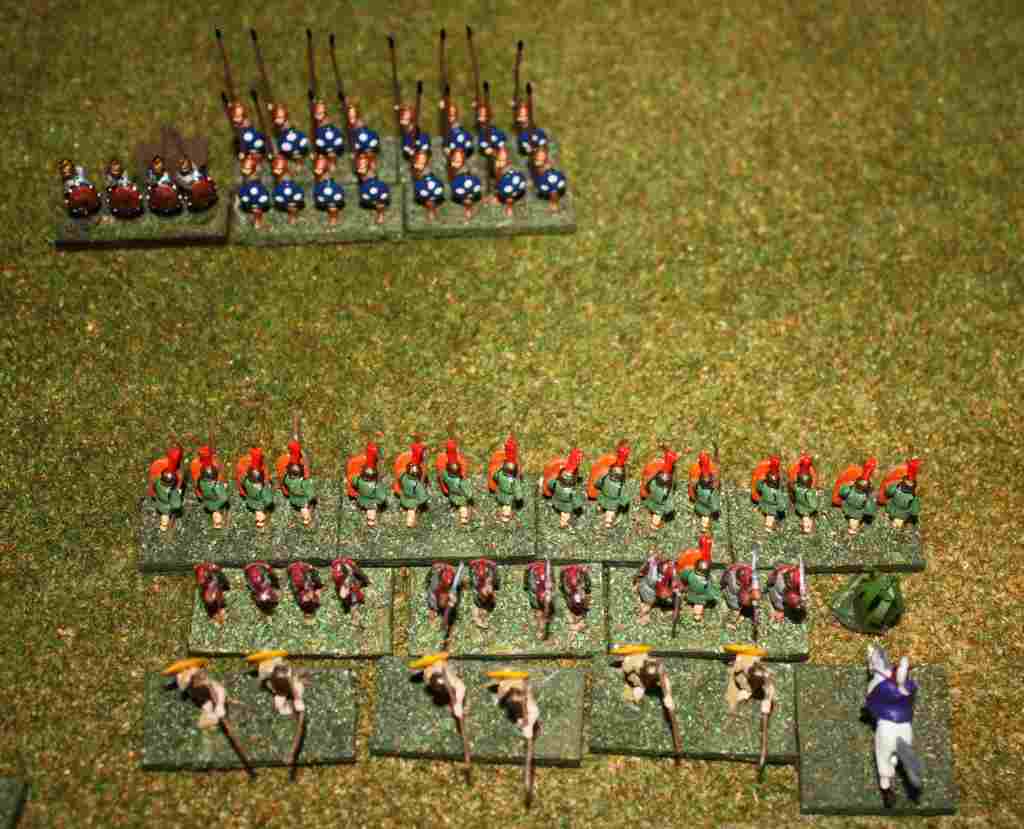
Crowded. But based on my standard deployment, just units are a bit wider and deeper. Have a look:
 |
| Epirot on the left, Romans on the right |
Romans will have initiative in the first turn as per my scenario notes.
Turn 1
Units are activated one at a time and do all their actions (move, fire etc) when activated. Activation is automatic if a unit is simply moving. Changing formation or facing etc requires a unit to pass a Training and Leadership test.
Romans activate Leves who move 6" and are now within Javelin range (5") of the Epirot skirmishers. Skirmishers can move and fire with no penalty so Leves now do so:
Leves has one missile attacks per stand (Thought is was two but the special rules on Skirmishers state it is always 1 per base) and have four stands = 4 attacks. Each attack is a d10 roll. Require a 6 or more, die modifiers of -1 target light armour -2 target skirmishers = 9+. 1 hit. The skirmishers have a Wound value of 2, so need 1 more hit before a stand is removed.
Romans activate the Hastati that move directly forward, then the Principes move directly forward. The Triarii wheel 90 degrees to their left to protect the Roman left flank. Wheeling does not require a leadership test. Previous games have proved the Roman cavalry on the left tends not to hold versus the Agema and Elephant so that is why the Triarii wheeled.
Epirots move up Agema and Elephants. While the Agema could charge the Roman cavalry (movement is doubled when charging and Agema move 8"), the Elephants cannot reach this turn. Better to wait until both units can charge the Roman Cavalry. Although I knew you could activate only one unit at a time, and the rules even have a section on multiple melees stating why it would not happen, at this stage I still thought the Agema and Elephant could charge in together. They cannot, and my brian clicked to it when I did want them both the charge and remembered the rule!
Now, what to do with the Phalanx and the Skirmishers. I can charge the Skirmishers into the Leves, I could fire on the Leves, I could retire the Skirmishers and charge the Leves with the Pikes to force a confrontation. I do not believe the phalanx should get involved too early and should try and time getting into melee with what happens on the flank. Epirot will charge their Skirmishers at the Leves to see how that works.
Leves defensive fire 6+ -1 light armour-2 target skirmishers -1 being charged = 10+ required. No hits. Leves counter charge rather than flee so I can see how melee works. Now for melee; bear with me as I have not played the rules before and while melee looks quite straightforward, there are as few steps:
Melee casualties: each is 4 stands 6+ to hit, die modifiers -1 target light armour, 7+ to hit. Each skirmisher has 1 melee attacks so 4 d10s per unit. Epirot Skirmishers inflict 2 hits which equals one Leves stand gone. Note that according to the rules I should have done a morale check here as the Leves have lost 25% of their unit but the rules errata state that morale tests are not taken for units in melee so lucky I forgot to do it here. Leves inflict one hit, so with 1 hit already on the unit, that is one stand gone.
Melee winner calculation:
Epirot d6 = 3 +2 (Levy) +2 (enemy skirmish) =7
Leves: d6 = 3 +3 (Trained) +2 (enemy skirmish) = 8
Epirot loses with a difference of 1, so now to the Melee Victory Table:
Epirot Skirmishers have lost 25% so add +2 for a total of 3 so retire back 4" and become shaken. They retire through the pikes.
Epirot activate the large pike unit (not the Hypaspist) and charge the Leves.
Leves have two choices depending on if they want to slow down the pike-legionnaire clash:
1.Defensive fire and stay their ground. Inflict a little damage and slow the pikes by a turn.
2.Flee and the pike can continue into the Roman heavy infantry.
As the Romans want it sooner rather than later - wait too long and the left flank is resolved possibly not in their favour.
Leves flee (2d6"). Pike block continues the charge and meets the Hastati unit. Now the pike unit only had just enough movement (charge is 2x normal move) and so hit the Hastati off-centre. Normally you should aim for the centre of the unit.
 |
| Triarii has turned (bottom centre) and pikes and Hastati contacted (centre). Hypaspist have not activated and are off stage to the top. |
Now, I made the pike units 3 bases deep as when I was reading the rules I thought a unit needed to be 3 stands deep to be classed as a phalanx. But on re-reading, it is that a unit that has 3 stands or less loses its phalanx status. Oops. Very different. I would have made the pike units only 2 stands deep in that case. So, as it is a solo game and it hasn't actually affecting anything yet, I have removed the third line of stands from the pikes and Hypaspist units. Lastly, the number of stands that fight is not released to stands in contact - the smaller width unit fights will all front stands, the larger fights with up to 2 more frontal stands. So pikes will fight with 3 stands, Hastati with all 4 (and could not have fought with more than 5 if they were wider). To further complicate matters, I have looked at the rules errata and phlanx units must be in two ranks to get the phalanx bonus. So if they lose one stand from the back, they are not in phalanx anymore! But there 6 unit phalanx will be very powerful against the 4 unit Hastati and Principes. Rather than increase the size of the Phalan and Romans by another rank, I will just leave them in two ranks and have the phalanx morale bonus be +1 (rather than +2) if there are still some stands in the second rank. Will be +2 if all stands are still in second rank.
Epirot Pikes Vs Hastati
Hand to Hand:
Epirot Pikes: Will roll 6 dice (2 per stand) for 7+ (6+ with die mods: -1 light armour). 3 wounds inflicted.
Hastati: 8 dice for 8+ (6+, -2 for medium armour). 4 wounds inflicted.
Note: Pila are represented by being able to re-roll any 1's rolled in melee.
Epirot Pikes lose a stand (also Wound 3) and carry over 1 wound.
Hastati lose a stand.
 |
| Hastati and Pikes get casualties (one base each). |
Melee results:
Epirot Pikes: d6 = 4 +4 regular +3 wounds inflicted +1 pike Vs infantry (note would be +2 but see discussion above - I've made it +1 as there are still stands in the 2nd rank) +1 deeper ranks = 13
Hastati: d6 = 5 +3 Trained +4 wounds inflicted = 12.
Victory table:
Hastati lose by 1 +2 for at 25% looses = 3. Result is retire 4" and shaken. Cannot retire 4" as Principes in the way so simply retire until I bump into them. Not sure what to do if you cannot retire the whole distance - I could not find it in the rules, but that does not mean it is not there! I eventually found it in the errata - if you cannot move the full distance, then bump up the result to one worse. But not I am thinking that both Hastati and Principes have the Drilled ability so I will rule that the Hastati retire through the Principes.
 |
| Hastati (middle line) retreat through the Principes (now to the front). |
Hypaspists advance. Now the Hastati have retired, they are too far away for the Hypaspists to charge.
Turn 2
With only a few units and starting close together, the game might not last too long!
Who goes first or second is determined only once at the start of the game - from then on, players alternative turns. Therefore it is the Romans turn.
Triarii move to protect the cavalry on the left flank.
Hastati roll a TL test to remove the shaken result - a 9. No.
Principes charge the Pike unit, who countercharge.
Pikes Vs Principes
Hand to Hand:
Epirot pikes: Will roll 6 dice (2 per stand) for 7+ (6+ with die mods: -1 light armour). 3 wounds inflicted.
Principes: 8 dice for 8+ (6+, -2 for medium armour). 1 wounds inflicted.
Principes lose a stand.
Melee results:
Epirot pikes: d6 = 2 +4 regular +3 wounds inflicted +1 pike Vs infantry (note would be +2 but see discussion above - I've made it +1 as there are still stands in the 2nd rank) +1 deeper ranks = 11
Principes: d6 = 5 +4 regular +2 wounds inflicted =11.
A roll off for a winner (for a melee tie both roll a d6 and lowest loses by 1). Epirot loses.
Victory table:
Epirot pikes lose by 1 +2 for at 25% looses = 3. Result is retire 4" and shaken.
 |
| Epirot pikes retire from the Principes in the centre. |
Epirot player turn - TL check on pikes - passes, not shaken.
Hypaspists charge the Principes, drifting obliquely to get as close to the centre of the Principes as they can. Principes countercharge.
Hypaspists Vs Principes
Hand to Hand:
Epirot: Will roll 4 dice (2 for 2 stands) for 6+ (6+ with die mods: -1 light armour +1 for difference in skill). 3 wounds inflicted.
Roman: 6 dice for 8+ (6+, -2 for medium armour). 1 wounds inflicted.
Romans lose a stand (down to 2 stands)
Melee results:
Epirot: d6 = 2 +5 seasoned +3 wounds inflicted +2 pike Vs infantry +1 outnumber by 50% or more stands +1 deeper ranks = 14
Roman: d6 = 4 +4 regular +1 wounds inflicted =9
Roman loses by 5.
Victory table:
Romans lose by 5 +5 for at 50% looses = 10. Result is rout 8" through Hastati and Leves, Hastati are drilled so no effect, Leves take a TL test and pass.
Hypaspists breakthough move 3" but this is not enough to reach the Hastati.
As they routed, every Roman unit within 8" (everyone but the Light cavalry!) need to take a morale test. All pass. It is a 6+ on a d10, with, for example, +3 for seasoned/vet and +1 for leadership value for units within 6" of leader (who is just behind the Principes).
 |
| Principes (just in front of the Leves) after retreating from the Hypaspists (at the top). |
 |
| Elephant charges into the Roman Heavy Cavalry |
Elephant Vs Cavalry
Hand to Hand:
Elephant: Will roll 3 dice for 6+ (6+ with die mods: -1 light armour +1 for difference in skill). 3 wounds inflicted!
Roman Cavalry: 6 dice for 10+ (6+, -1 for medium armour, -1 for skill difference, -2 shaken). 0 wounds inflicted.
Romans lose a stand.
Melee results (note that some modifiers are not applicable in melee with elephants):
Elephant: d6 = 5 +4 regular +3 wounds inflicted +2 enemy shaken = 14
Roman cavalry: d6 = 3 +3 trained +0 wounds inflicted = 6
Roman loses by 8.
Victory table:
Romans lose by 8 +2 for formed troops Vs elephants = 10. Result is rout 10" (off the table). Elephant breakthrough moves 6", also off the table.
 |
| Elephant and roman Cavalry now missing from the Roman left flank |
The elephant is really powerful! But then I have just looked at the points - the elephant is 167pts and each of the roman cavalry stands is 45pts. And elephants Vs cavalry was never going to be great either.
More morale checks for the units within 8". Everyone passes.
So the Agema will charge the the Triarii. Oops. Unfamiliarity with the rules - the Triarii would expect the Agema and the Elephant would both be required to rout the Roman Heavy cavalry so are facing the flank of the Roman cavalry. But with the Elephant doing the job on its own, the Agema have a golden opportunity to flank the Triarii. In hindsight, I would not have wheeled the Triarii, just left it near the baseline as a reserve. I blame being too ingrained in what happens in the other replays. Note that is will not be a flank attack as no stand of the Agema started the charge on the flank of the Triarii. Triarii do not countercharge so they can get a +1 for defending and being steadfast.
 |
| Agema hit Triarii in the flank |
Agema Vs Triarii
Agema: Will roll 4 dice (2 for 2 stands) for 8+ (6+ with die mods: -2 medium armour). 2 wounds inflicted.
Triarii: 8 dice for 8+ (6+, -2 for medium armour). 0 wounds inflicted. (this is just unlucky dice rolling compared to the Agema!)
No stands lost.
Melee results:
Agema: d6 = 2 +5 seasoned +2 wounds inflicted +1 deeper ranks +2 commander rating = 12
Triarii: d6 = 3 +5 seasoned +0 wounds inflicted +2 long spears Vs cavalry +1 steadfast =11 (so close!)
Roman loses by 1.
Victory table:
Romans lose by 1 and recoil 2". A recoil is directly away from the enemy. As the Triarii are in a line almost perpendicular the the Agema, and if the line just moved back 2" this would seem strange; so I setup the Triarii in a line parallel to the Agema but 2" away from them.
 |
| Triarii retreat |
Turn 3
Rally Principes: d10=6 +1 commander in range +2 regular -5 50% stands = 4. Continue to rout off the board.
TL test to remove shaken status from Hastati: 2d6 = 4 +1 commander in range = 5. this is less than the Hastati TL of 7, so not shaken anymore. Can do nothing else this turn.
Leves move through the Hastati to now be between the Hypaspists and the Hastati. So they shoot at the Hypaspists: no Hits.
No more Roman moves
Epirot Hypaspists charge the Leves who stay to do some defensive fire. 1 wound.
 |
| Hypaspists in melee with the Leves |
Hand to Hand:
Hypaspists: 4 rolls, 2 wounds inflicted.
Leves: 3 dice. 1 wounds inflicted.
Hypaspists now lose a stand (down to 3 stands)
Leves lose a stand (only have wound 2 so lose a stand receiving 2 wounds)
Melee results:
Hypaspists: d6 = 5 +5 seasoned +2 wounds inflicted +2 enemy skirmisher +1 outnumber by 50% or more stands +1 deeper ranks = 16
Leves: d6 = 6 +3 trained +1 wounds inflicted =10
Roman loses by 6.
Victory table:
Romans lose by 5 +5 for at 50% losses = 10. Result is Leves rout 8" through Hastati. Skirmishers do not cause rout checks.
Hypaspists get a breakthough move on 3" into the Hastati.
 |
| Overview of Roman side of table with Hypaspists in melee with Hastati |
Hand to Hand:
Hypaspists: 2 rolls, 0 wounds inflicted.
Hastati: 3 dice. 0 wounds inflicted.
Melee results:
Hypaspists: d6 = 3 +5 seasoned +1 deeper ranks +2 enemy shaken =11
Hastati: d6 = 2 +3 Trained +1 commander near =6
Roman loses by 4.
Victory table:
Romans lose by 5 +2 for at 25% losses = 7. Result is rout 8". Hypaspists followup 3".
 |
| Another overview of the Roman side after the Hastati retreat |
Agema charges the Triarii:
Agema Vs Triarii
Agema: 4 dice, 2 wounds inflicted (one Triarii stand gone, 1 wound carried over)
Triarii: 8 dice for 8+ (6+, -2 for medium armour). 3 wounds inflicted, one Agema stand gone.
Both Triarii and Agema down to 3 stands.
Melee results:
Agema: d6 = 2 +5 seasoned +2 wounds inflicted +1 deeper ranks +2 commander rating = 12
Triarii: d6 = 4 +5 seasoned +3 wounds inflicted +2 long spears Vs cavalry +1 steadfast =15
Agema lose by 3.
Victory table:
Agema lose by 3 +2 at 25% losses = 5 and retreat 9" and are shaken. Triarii advance 2"
Pike block advance down the table.
Turn 4
Romans rally Hastati: d10=4 +1 commander in range +2 trained -2 25% stands = 5. Continue to rout off the board.
Romans rally Leves: d10=5 +1 commander in range +2 trained -5 50% stands = 3. Continue to rout off the board.
 |
| Game end. Triarii are to the bottom left, Roman general bottom right, rest are Epirot. |
Note that the Roman side have reached their breakpoint. The only effect this has is no Roman unit can rally off its shaken status. I decide to call the game here. The Romans have really only the Triarii (at 75%) while Pyrrhus can call on the Agema, Hypaspists and the other Phalanx. While all of the Epirot units have taken some damage, it will take some luck for the Triarii not to be worn down by the attacks of the three units and rout. I call it a win for Pyrrhus.
Verdict
It was a fun game. Multiple dice rolling is not really my style, and I am not used to checking three tables for a melee result (inflict wounds, determine who won melee, determining result). But the game plays smoothly and the rules are not complex. There are plenty of examples in the book to help out. It also has a really good ancient battle feel to it (and yes, this is subjective I know). The game is definitely not suitable for 2'x2', and this is obvious in the rules and mentions 4'x4' minimum - but I would say you could get by with a minimum of 3'x3' to get a decent game, but wider and deeper is better. I do not know how long the game took as I was looking up the rules and writing it up as I went, but I believe playing time would have been less than 1 hour. The rules are recommended, a small table size for 15mm is not. I would play them again - on a larger table.


.jpg)


No comments:
Post a Comment